Facebook Groups are a fantastic platform for connecting and communicating with like-minded people, sharing your interests and expressing your opinions, but that doesn’t mean you can’t monetise this opportunity. As a Facebook group owner, you could be sitting on a goldmine, you just need to learn how to mine the gold!
There’s a fine line to tread. Of course, you want to make money from your group, but you also want to maintain the integrity of your group and avoid turning people away. To do this, you need to be tactful and follow tried and tested techniques.
In this article, we’ll show you exactly how to make money from your Facebook group (in 7 different ways!) with step-by-step examples. For the purpose of this article, we’ll be using our example Facebook Group based around wedding fitness: Get Fit Tips for Brides and Grooms!
Here’s what we’ll cover:
1. Grow Your Group & Opportunity
1.1 Create a Facebook Ad Campaign
1.2 Add Qualifying Questions
1.3 Go Beyond Facebook
2. Sell Print-on-Demand Merchandise
3. Create a Paid ‘Premium’ Group
4. Create (and sell) a Course to Help Others
5. Sell Ad Space in Your Group
6. Leads and List-Building
7. Keep Engagement High
7.1 Know When to Post
7.2 Include Media
7.3 Ask Questions
8. That’s a Wrap!
1. Grow Your Group & Opportunity
One of the best ways to increase your chances of making money from your Facebook group is to constantly grow it. As your group steadily becomes bigger and members more engaged, your net of potential customers grows wider.
The great news is, because you already have a Facebook group, you already know who your ideal customers are. All you need to do is go out and find more of them. There are a couple of ways you can do this…
1.1 Create a Facebook Ad Campaign
As you might be aware, it is not yet possible to create an ad campaign directly from your group (although there are murmurs and whispers that Facebook is working on this). However, there are ways to get around it. If you haven’t already, create a Facebook page to match your group. You then want to link your group and your page.
The reason having a page is important is because Facebook pages have the “boost post” option which is great for getting your message in front of a targeted audience. Currently, you can’t do this from your own profile or from a group. To connect your group and your Facebook page, head to your page and click on Groups on the left-hand side. You should see this pop-up:
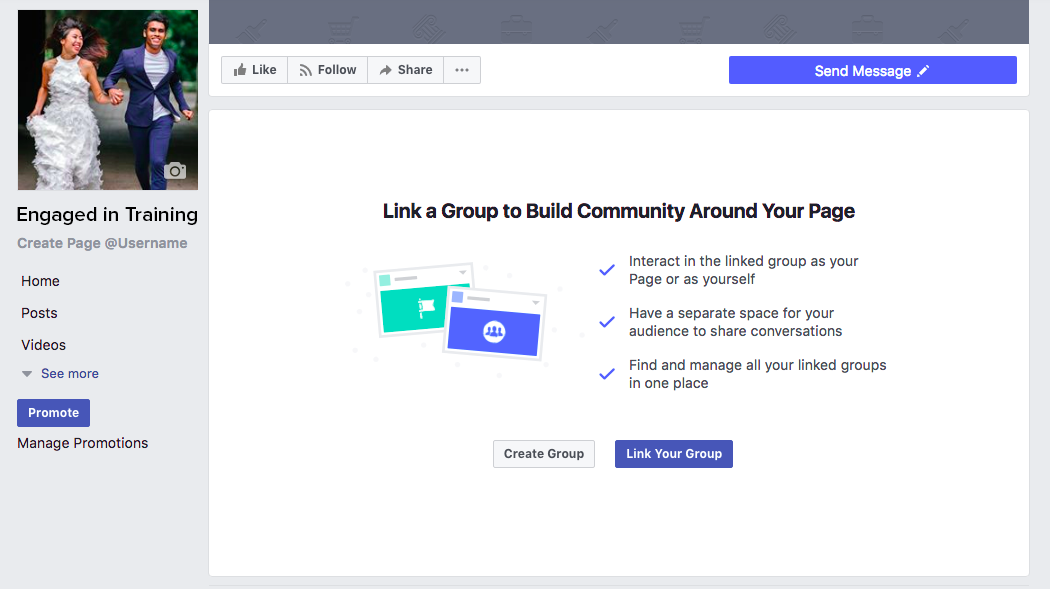
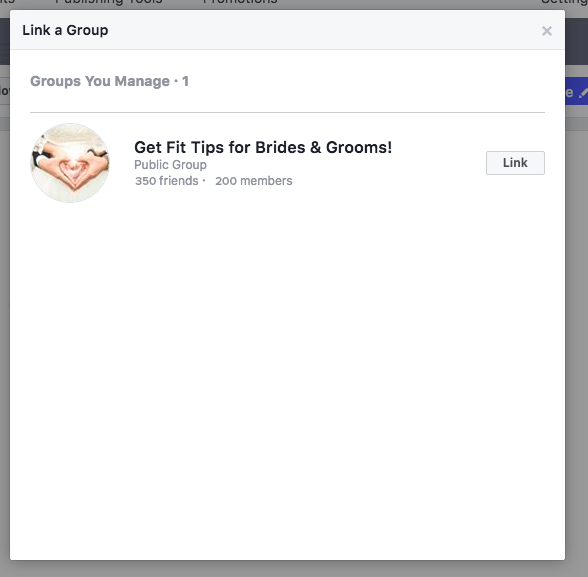
Click Link Your Group and another pop-up will appear, showing your group. Then click Link.
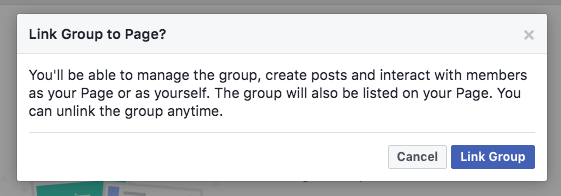
A further pop-up will appear letting you know that you can manage your group from your page. Click Link Group to confirm.
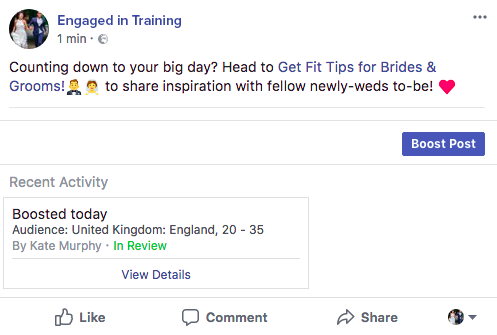
Once you’ve done this, go back to your page and create a post. Here, you’ll see the option to Boost Post that you don’t get on private profiles and group pages. Make sure your group is tagged in your post so that users are directed there. When you’re happy with what you’ve written, click Boost Post.

Another pop-up will appear (you’ll be seeing a lot of these!) that will allow you to make your post as targeted as you possibly can.
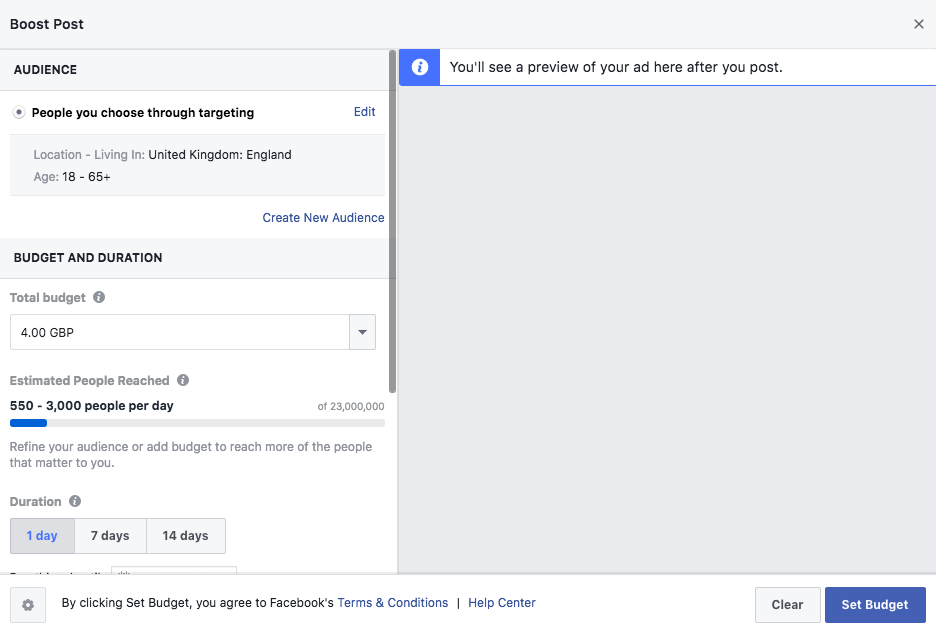
To create a targeted audience, click Edit (you guessed it, another pop-up!) Refine your audience by gender, age, location and interests, then hit Save.
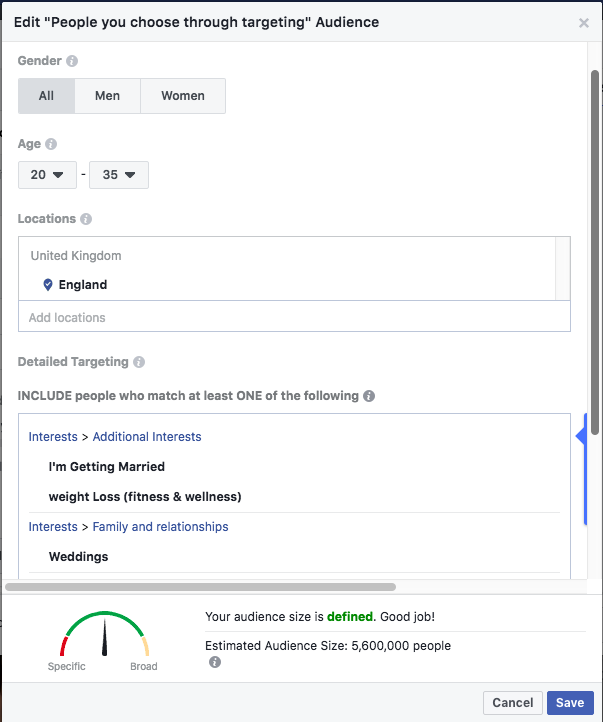
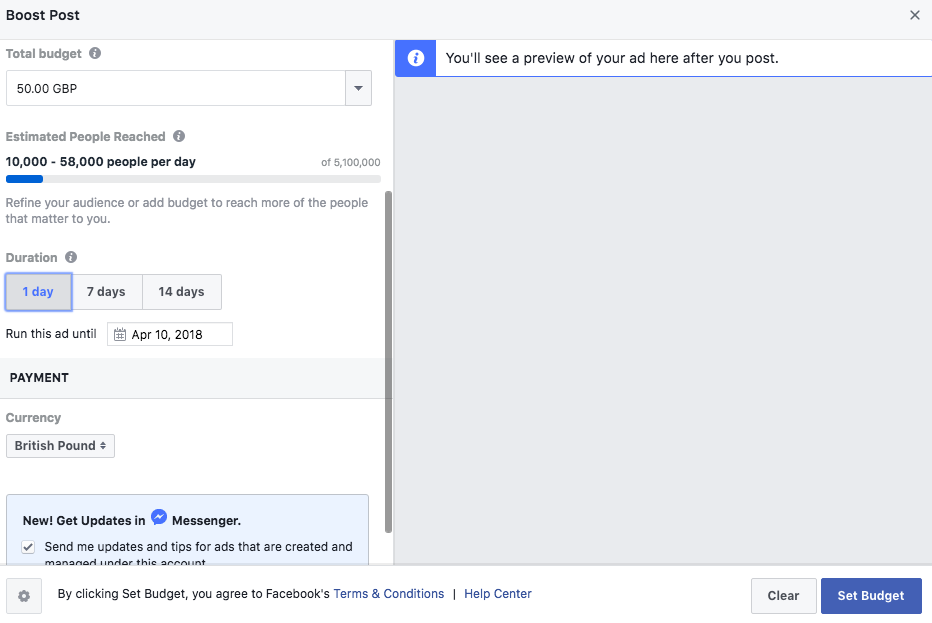
Next, amend your budget and the duration of the ad to adjust the reach of your campaign. When you’re happy, click Set Budget.
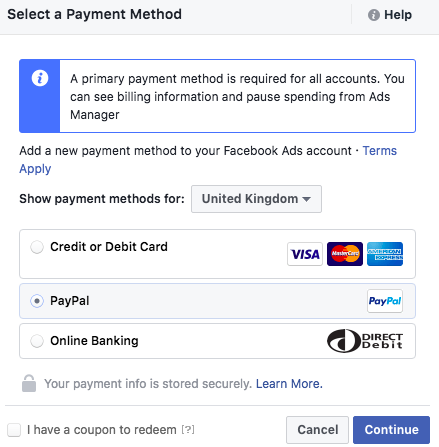
You’ll be asked to enter a payment method. Once you’ve done that, hit Continue:
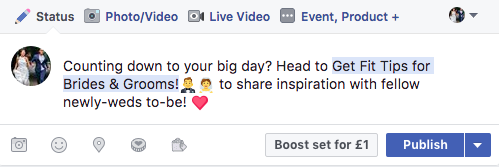
From there, you will be redirected back to your post. Hit Publish to confirm that you want to boost it.
…and voilà!
1.2 Add Qualifying Questions
Growing your group is all well and good, but to make money from your Facebook group, you need to make sure that you’re attracting the right people. You can do this by asking pending members questions before they join. To set this up, click Manage Group on the left-hand side of your group page.
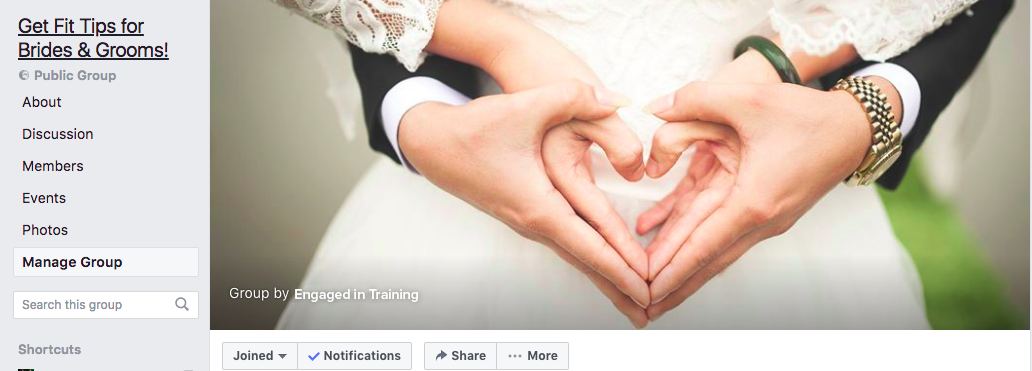
From there, click Member Requests > Get Started:
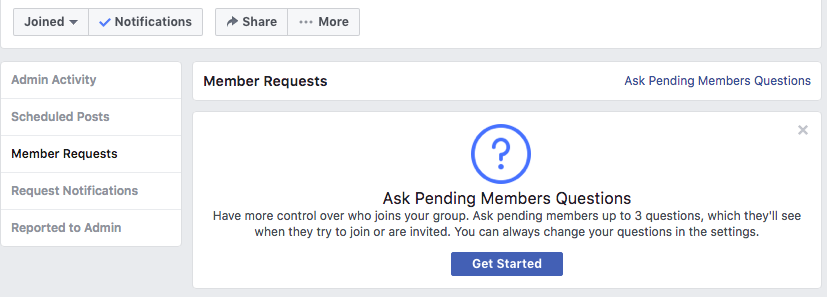
Ask questions that would be relevant to your ideal group members (a.k.a your ideal customers). You can ask up to 3 questions, but keep it light! You don’t want to put people off joining your group.
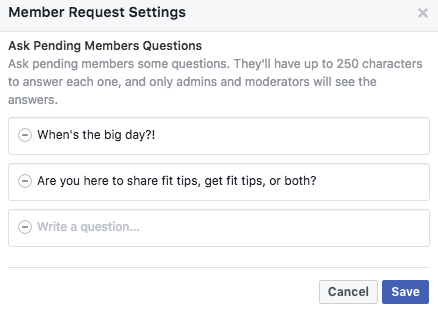
Click Save when you are happy with your questions and then click OK on the following pop-up box:
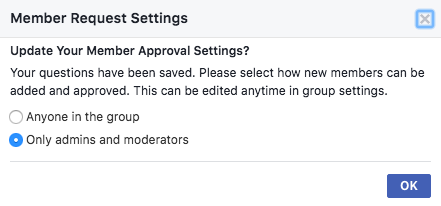
This will ensure that you are the only one who can add new members to the group.
1.3 Go Beyond Facebook
Even though your group lives on Facebook, that doesn’t mean you can’t promote it elsewhere. If you want to grow your group, then you should promote wherever you can: your website, other social media channels (Twitter, Instagram etc.), even offline channels, like leaflets (this is particularly useful if you run a local group!)
2. Sell Print-on-Demand Merchandise
Print-on-demand merchandise is possibly one of the easiest ways to make money online, especially if you already have an audience. Basically, all you do is upload designs to a print-on-demand (POD) platform, like Kite.ly, and then link your Shopify store to your Facebook page.
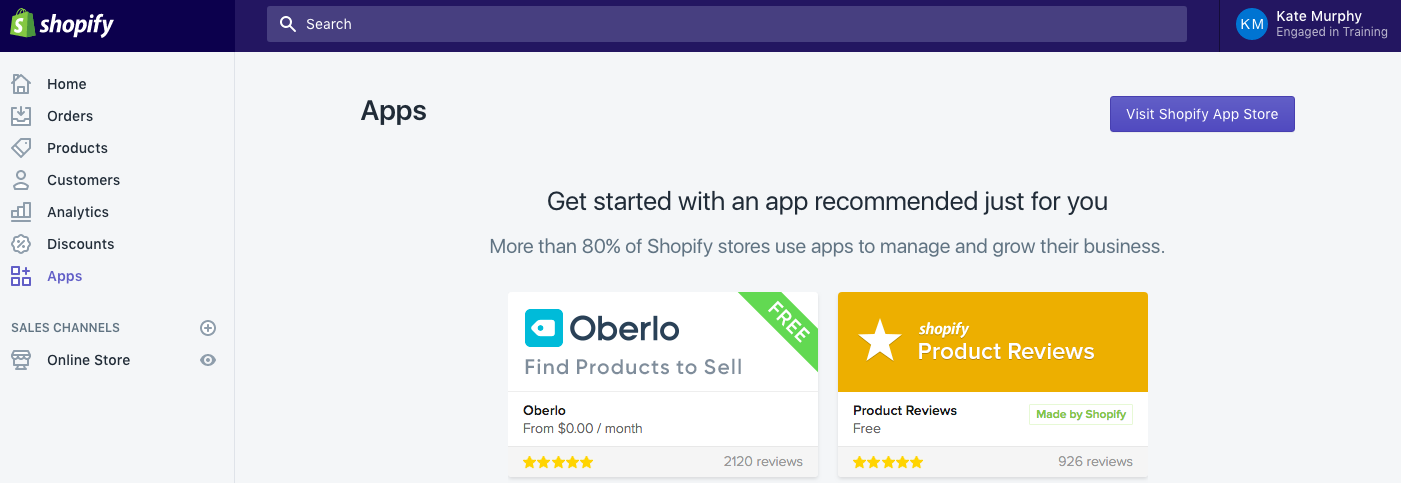
First, you need to sign up for Shopify (they usually have free trials available for new customers). From there, you need to click on Apps on the left-hand side and then Visit Shopify App Store:
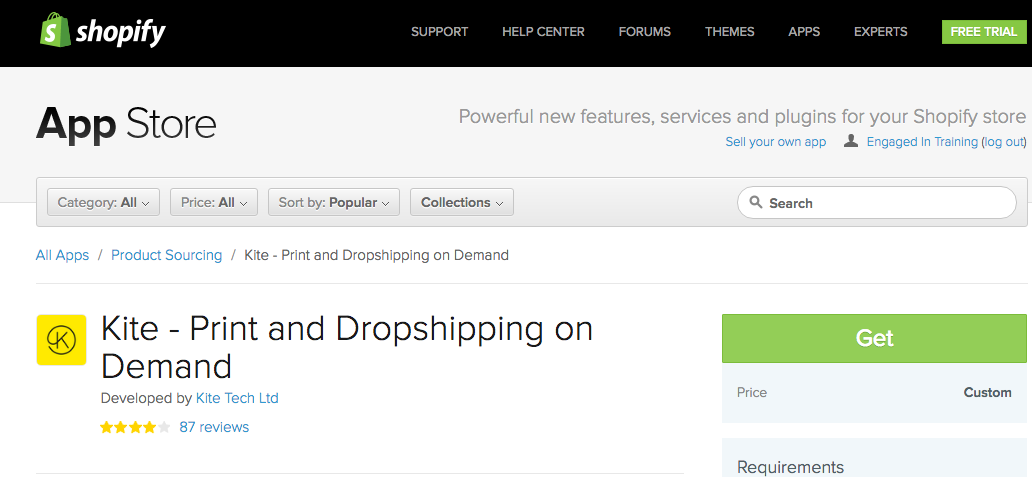
Once inside the App Store, search for Kite and click Get:
Kite will install within seconds. From there, you can upload your designs. Of course, first you need to have designs! For help with this, take a look at our previous article: How to Source Ideas and Designs for Custom Merchandise.
Once you have your designs, upload them to Kite and start creating your products. Within the product generator, you will be able to see your designs on all different products.
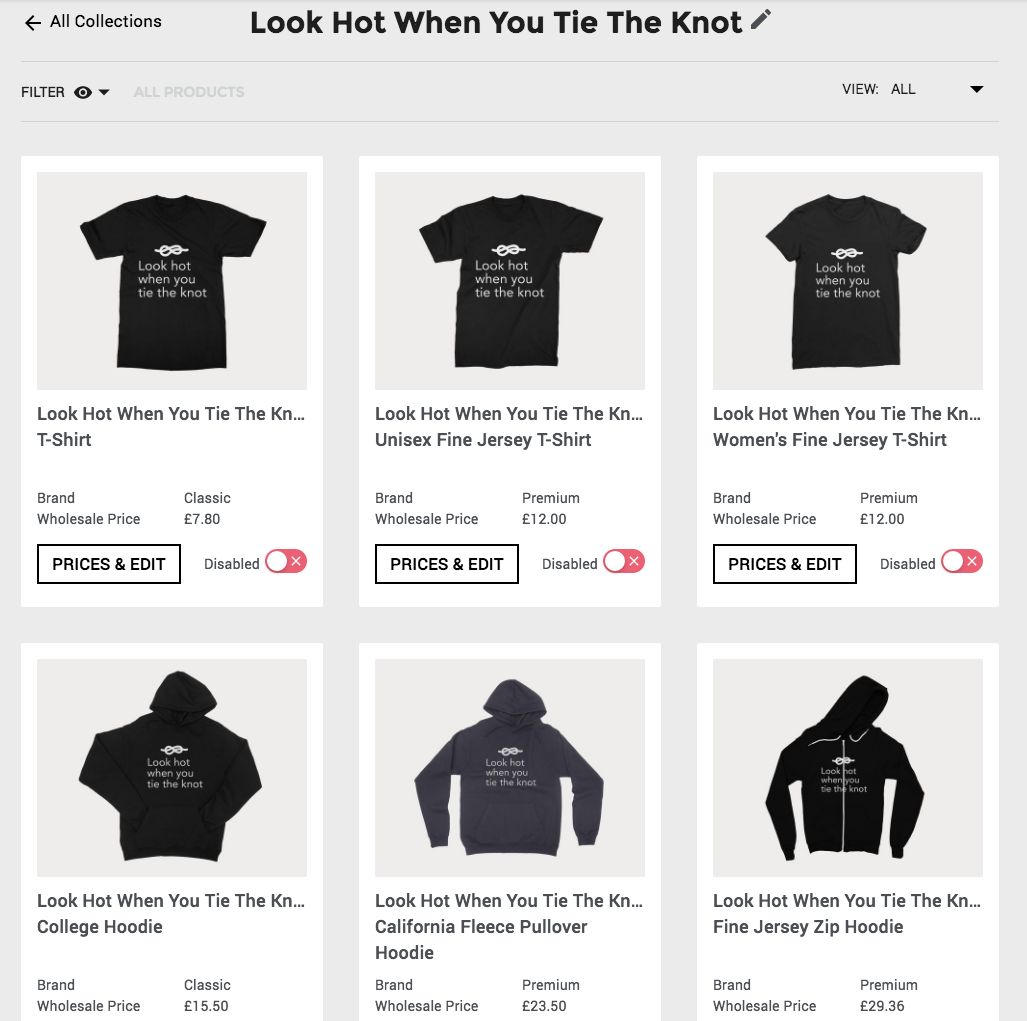
You can enable products for your store by simply dragging the toggle from left to right:
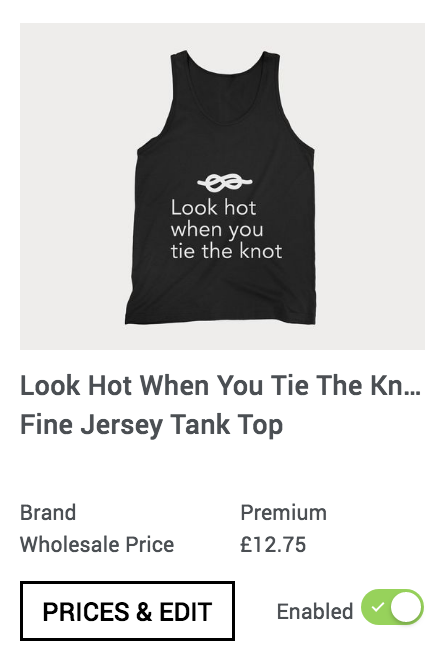
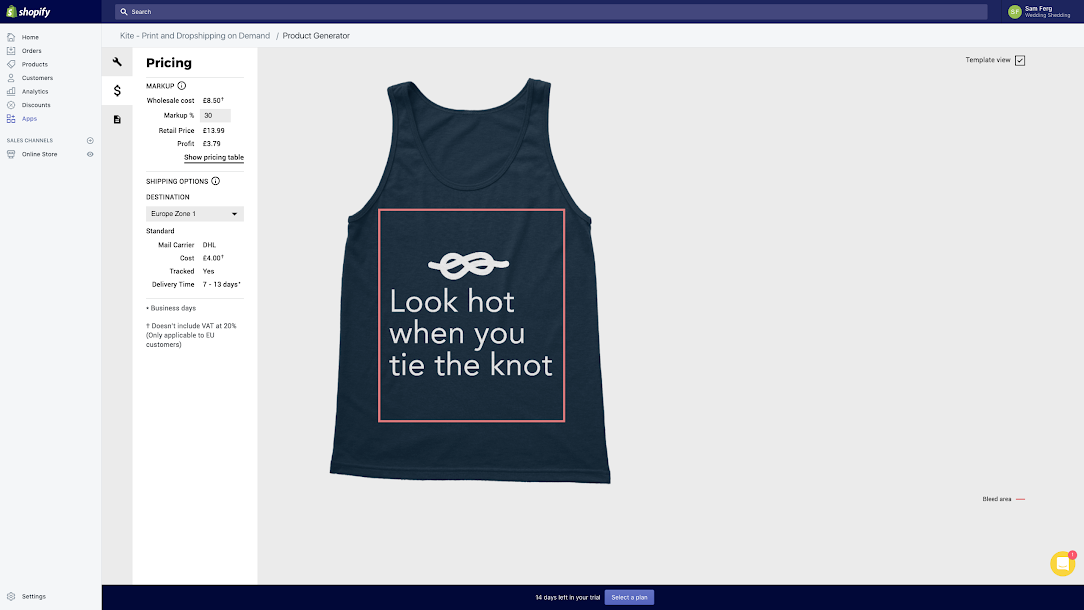
Or you can also click on Prices & Edit to make changes to your products, including altering the design and increasing or decreasing your markup:
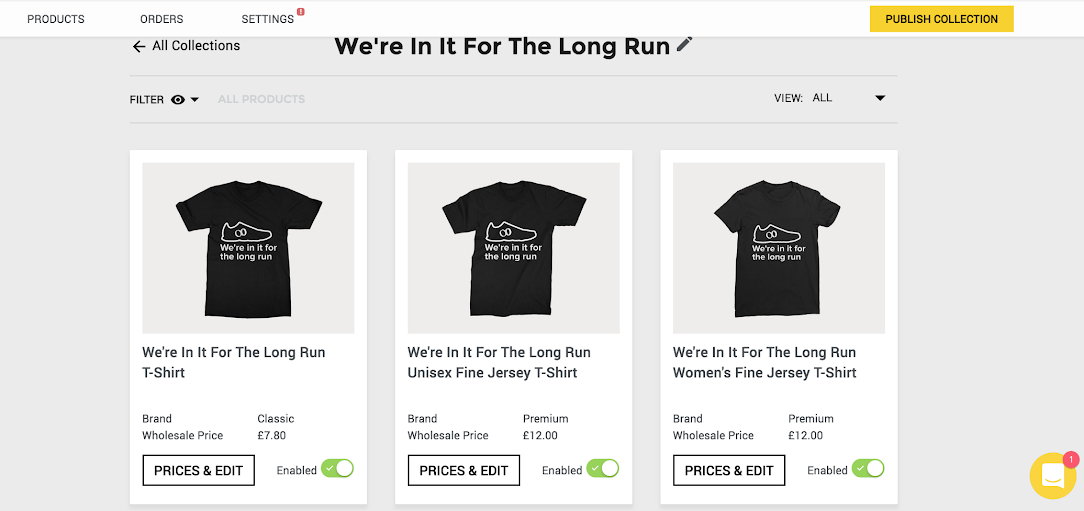
Once you are happy with all of your products, click Publish Collection.
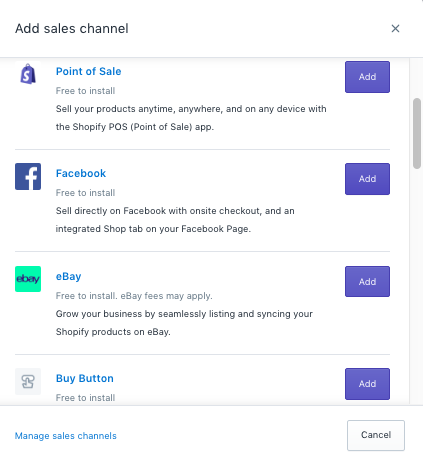
While you’re waiting for your collections to publish, you can link your Facebook page to your account in preparation for selling to your group. To do this, click the plus icon next to Sales Channel and then click Add Facebook:
You’ll then be asked to connect a Facebook business page to your Shopify. Select your group and click Connect Page.

Facebook will then review your page. This can take up to 48 hours, but usually takes much less time. When it is complete, you will be able to click the Facebook tab on the left-hand side of your Shopify account and view what your products will look like within Facebook:
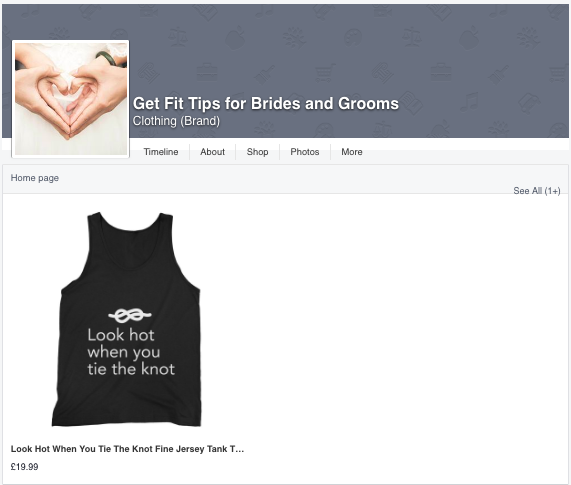
If you’re happy with how your products look, you can click Enable to complete the process and start selling directly through Facebook. However, to do this, you will first need to sign up for one of Shopify’s paid plans.
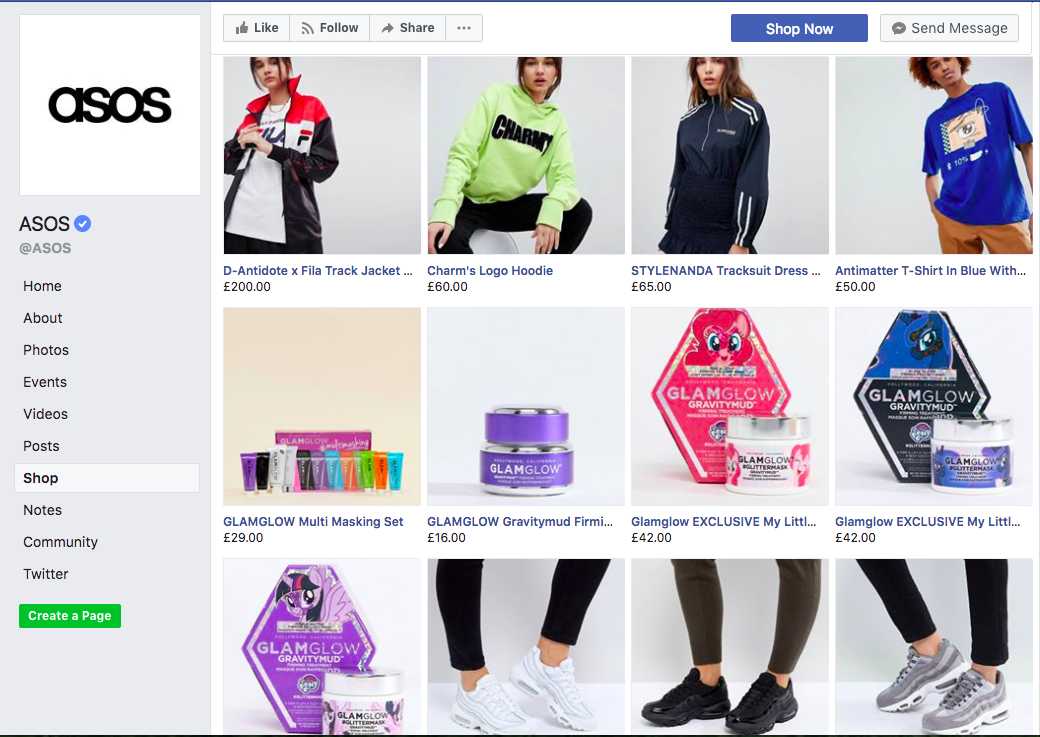
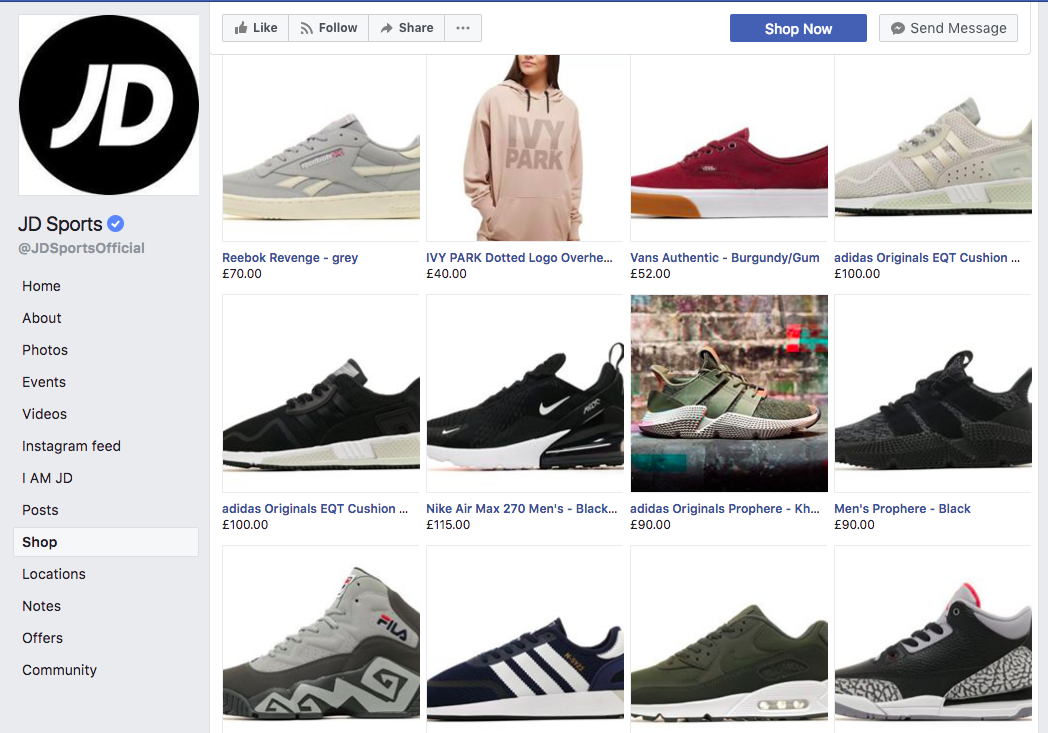
Here are a couple of examples of Facebook shops to inspire you:
3. Create a Paid ‘Premium’ Group
Did you know that aside from finding ways to sell to members of your group, you can also charge members directly to join?
Think about it: In “real life” people happily pay membership fees to be a part of groups and clubs, so – with all of the time and effort you put into your group – the same should apply to Facebook.
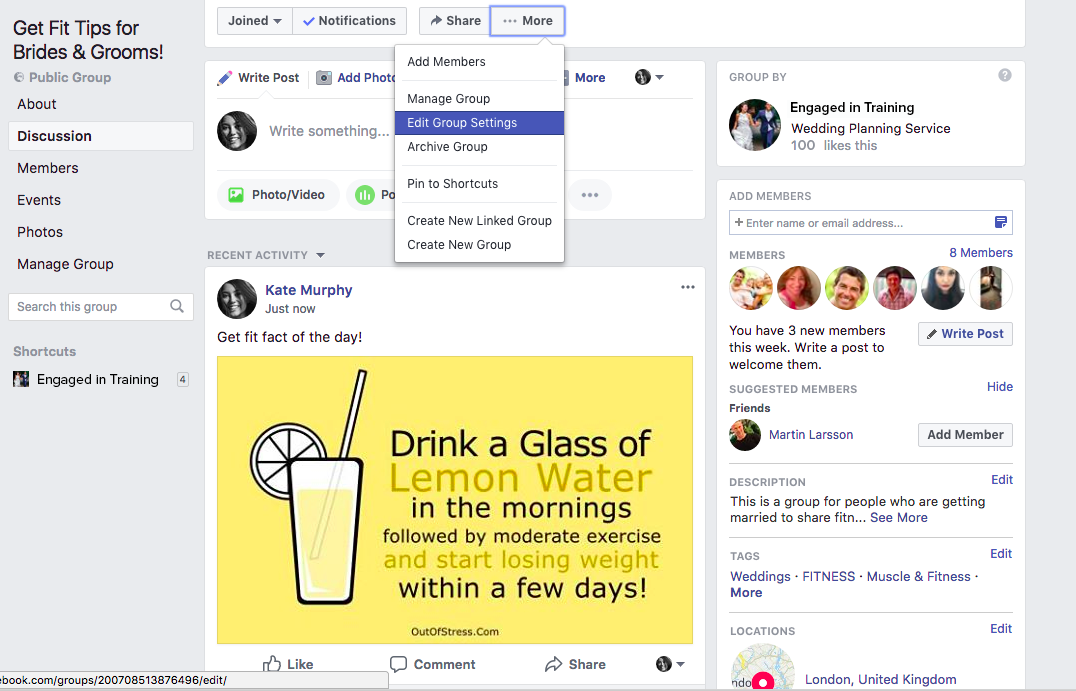
The first step towards making your group premium is making it private. This way, any new members that want to join will have to pay the fee first and then be accepted by you as a member. To do this, head to your group page and click the More tab under your cover photo. Then select Edit Group Settings.
Scroll down to Privacy and click Change Privacy Settings:
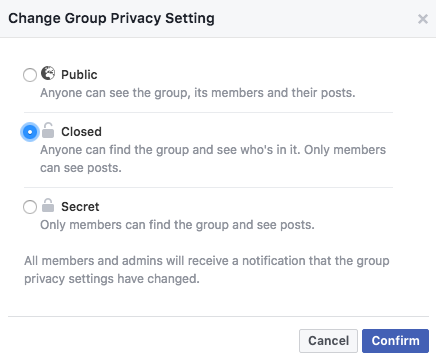
Change your group to Closed and click Confirm. Now, if anyone wants to join your group you will need to accept them first.
The next step is setting up recurring payments. You can do this on a couple of different trusted platforms, like Square, Stripe, and Paypal.
Here, we’re going to go through how to set up recurring payments on PayPal, but if you would prefer to use Square or Stripe, click the links to check out the step-by-steps on their websites.
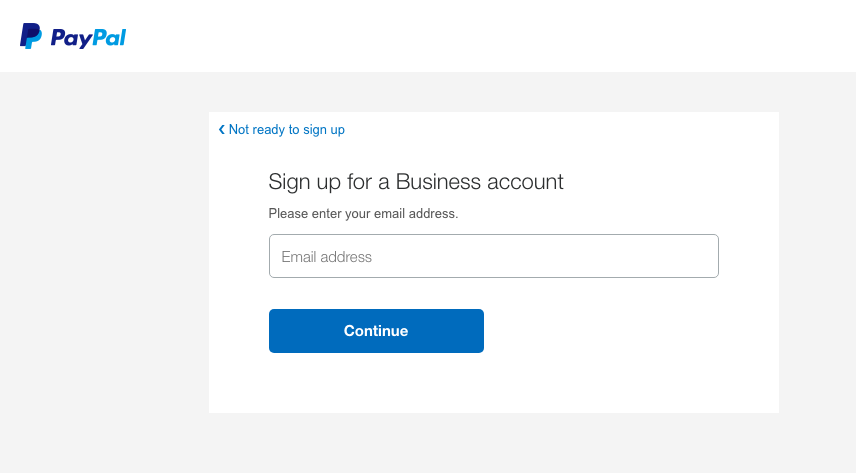
The first thing you need to do is sign up for a PayPal business account.
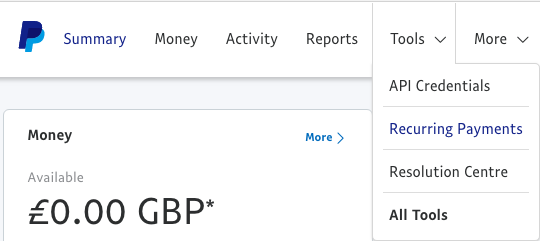
Click Tools at the top of the page and then, from the drop-down menu, select Recurring Payments.
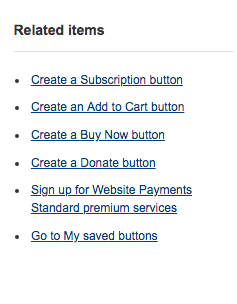
From your recurring payments dashboard, click Create a Subscription Button from the list of related items on the right-hand side:
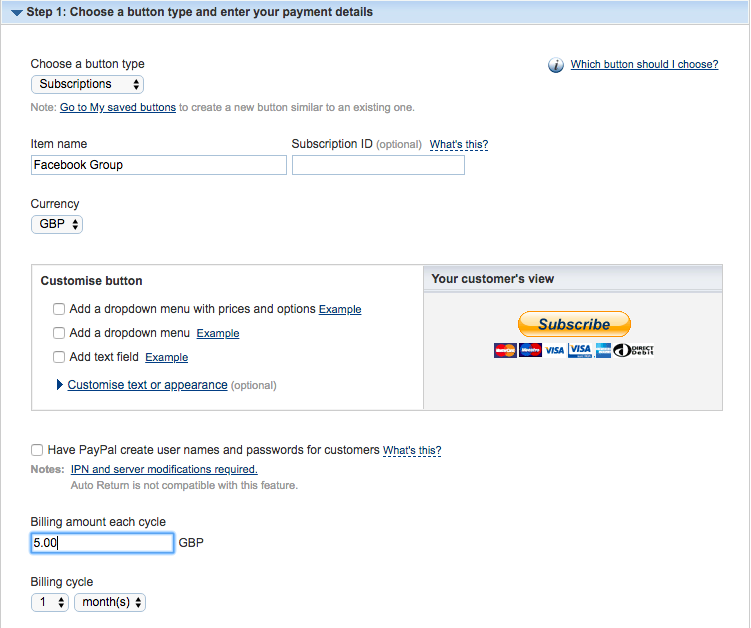
Follow the steps on that page to set up a recurring payment, entering your billing amount and billing cycle, this would be whatever you want to charge members for joining your Facebook group. In this example, we’ve gone for £5 per month.
After setting all of that up, you need to let users know that there is a membership fee for joining the group. To do this, head back to Facebook and update your group description to include your payment link.
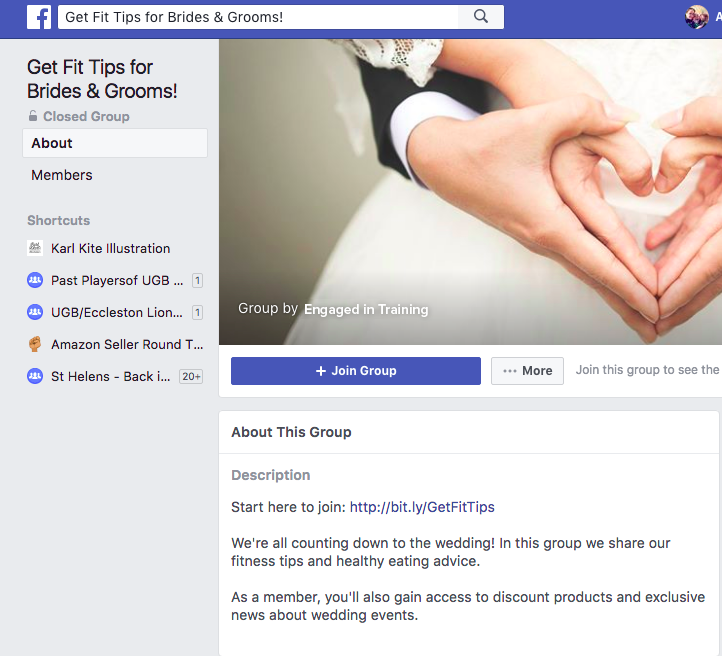
Just like in the above example, you need to make sure users know exactly what they’re getting by becoming a member (and why it is worth the membership fee!). This will entice them to sign up for a subscription and join!
4. Create (and sell) a Course to Help Others
One of the best money-making mindsets is to start focusing on how many people you can help, rather than how many people you can sell to. A great way to share your knowledge and help the members of your group is to create (and sell) a course, like the one seen here on the Facebook page, Motivational Mummy:
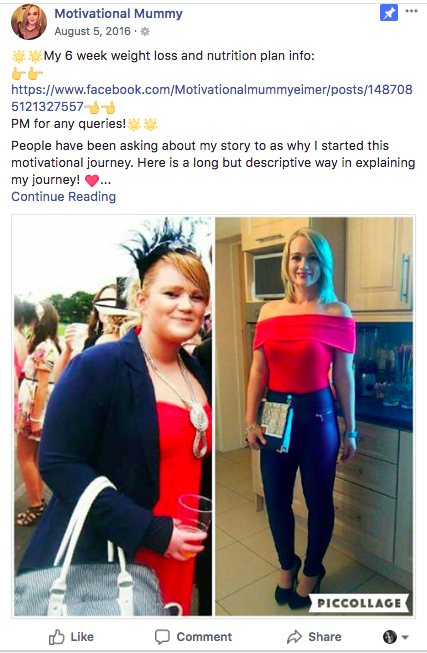
To start, create a rough plan of what your course will offer. Using our group Get Fit Tips for Brides & Grooms as an example, a rough plan could look something like this:
6 Weeks to Fit in the Dress (or Suit!)
- Week 1: 7 healthy breakfast recipes and 5 cardio workout videos
- Week 2: 7 healthy lunch recipes and 5 yoga workout videos
- Week 3: 7 healthy dinner recipes and 5 exercise videos for when you’re busy
- Week 4: 3 Motivational Weight-Loss stories (including before & after photos)
- Week 5: 7 healthy dessert recipes and 5 fun workout ideas
- Week 6: Countdown to the day! New videos every day, mixture of motivational, exercise and recipes
Of course this is a lot of content to create, but that’s why you can charge a generous amount for it. And, once it’s done, it’s done! You will have a chunk of content that can generate revenue time and time again.
A great platform for creating an online course is Skillshare. Take a look at their Become a Teacher handbook to find out more.
5. Sell Ad Space in Your Group
On the face of it, selling ad space doesn’t sound like the most ethical way to monetize your group. But you are in charge of who advertises, so it can actually be a very positive thing for your group and members.
Selling ad space is also known as affiliate or micro influencer marketing. It is the process of connecting with businesses and influencers in your industry and marketing their product, brand, or service to your group for a fee.

Finding the right influencers to connect with can take a little while. Luckily, we’ve created an infographic called The Influencer Marketing Landscape that lists lots of platforms, agencies, consultancies and more where you can find and connect with brands.
But remember: money can be tempting. However, it is important that you don’t undermine the credibility of your group by advertising irrelevant products or spamming your members with poor content. The long-term sustainability of your group relies on the relevancy and the quality of the content you post.
6. Leads and List-Building
If you’re looking to generate revenue on a continuing basis then it helps to have another way to contact your prospects in addition to your Facebook group. One of the most effective ways to do this is by building an email list. To do this, you need to create content or offers that are enticing enough for people to be happy to exchange their email address for them.
There are different ways to ask for your members’ email addresses, depending on what it is you are offering. If you’re offering content like a video, you can place a lead capture form halfway through, or before the most interesting section, with Wistia’s turnstile feature.
If you’re selling print-on-demand merchandise through Shopify, you can use an app called Privy to produce high-converting popups that encourage users to enter their email address and/or convert. Take a look at the video below to find out more about how it works:
Embed Code: <iframe width=”560″ height=”315″ src=”https://www.youtube.com/embed/g2dy8bGKbrM” frameborder=”0″ allow=”autoplay; encrypted-media” allowfullscreen></iframe>
Once you have a list of your members’ email addresses, the real question is: How can you translate this into money?
The answer: you need to create an email nurturing sequence. This is a sequence of emails designed to nurture people from being a lead, all the way to a converted customer. To find out exactly how to do this, check out this comprehensive article: Creating Your First Email Nurture Sequence
7. Keep Engagement High
Your group may have tons of likes and members, but if none of them engage with you, then you won’t generate revenue. Here are our top 3 tips for keeping engagement high on your Facebook group (for free!)
7.1 Know When to Post
Facebook is a fast-moving place. So if you post at a time when none of your members are active, by the time that they do log in your post will be lost among a sea of baby pictures, life updates, and cryptic statuses.
To increase engagement, you need to know the best times to post. By using a social media management platform, like Buffer, you can schedule your posts to appear at the best times for engagement.
7.2 Include Media
Photos and videos receive more engagement than text posts because they are more eye-catching.

According to Kissmetrics, photos get 53% more likes, 104% more comments and 84% more click-throughs on links than text-based posts.
7.3 Ask Questions
A straightforward way to encourage engagement is to ask your members a question, like this:
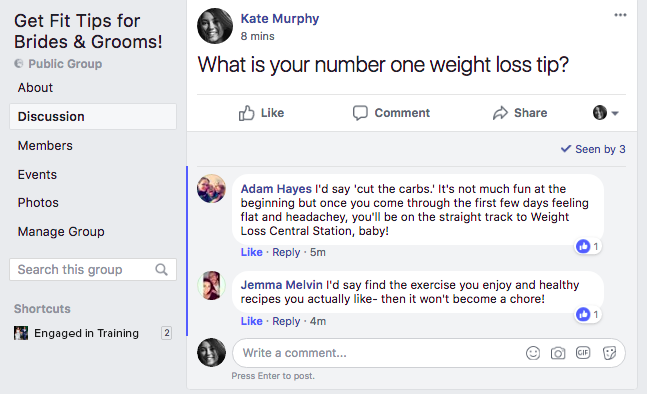
This opens up a dialogue without being “salesy”, which is important when your platform is a social networking site.

تعليقات
إرسال تعليق